- Coding Classes For Kids – How To Create My First Website? – Basic Tutorial
- Coding Classes For Kids – Website File Structure – Basic Tutorial
- Coding Classes For Kids – Website Skeleton – HTML Basic Structure – Basic Tutorial
- Coding Classes For Kids – Website Content – HTML Tags – Basic Tutorial
- Coding Classes For Kids – Styles Introduction – CSS Selectors & Properties – Basic Tutorial
- Coding Classes For Kids – How To Create My First Website? – Wrap Up
HTMLWow, it is time for a fun part! We created our basic files and the skeleton of our website. It is time to add content to our page and see the page in our browser! Let’s start with creating elements based on HTML tags.
Remember, if you have any questions during the course, feel free to ask me in the comment section below.
Contents
Header
Let’s start from the beginning. At the top of our page we should add a logo and title of the page. Usually this part also includes menu (navigation) with the links to other pages of our website, we will skip it for now.
We will focus on this part:
<body>
   <header>
   </header>
<body>
Img – Logo
It is time to add our logo. Let’s use some free online tools to create our logo first, for example; FreeLogoDesign or Fotor. To download a ready logo via FreeLogoDesign, you will need to provide your email. Ask an adult to do it for you. As soon as you are done, let’s add it to our page.

Do you remember when we were talking about file structure? We created the folders website and img. It is time to open folder img in the website folder and save your new image over there. Name your image logo.png.

In order to add an image to our site we need to add a specific tag
<img src=""img/logo.png alt="Logo of my page" />As you can see we need to add <img> tag. Let me explain what the rest of the elements mean. Each of the tags can have its own attributes. Attributes provide details for tags, for example they explain how a tag should work. Attributes need to be added inside of the tags. You need to know that each tag has its own set of attributes. In our case the <img> tag has src attribute and alt attribute.

src means source, it tells the <img> tag where to find the image which the tag needs to show. Do you remember that we added our image to the img folder? In this case, we need to say that the path to our image is “img/logo.png“. For example, if our folder would be called “images“, then we should add src=”images/logo.png” – I hope it is clear now.
Another attribute is alt, it is used for the description of the image. It is really important and we cannot forget about it. It is used by search engines to find information about our images, or it is shown when images cannot be loaded on the page for some reason.
Just to make sure, that everything is clear, this is what your code should look like:
<body>
   <header>
      <img src="img/logo.png" alt="Logo of my page"/>
   </header>
</body>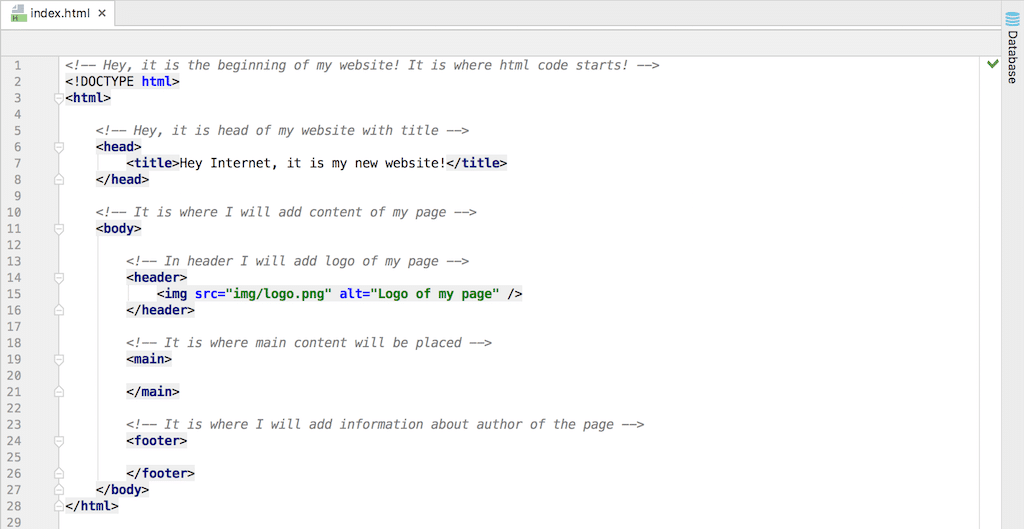
At this point, let’s also create a heading image which we will use later on. I have created something like this:

Save image as heading.png and add it to img folder.

Heading
Headings are really important in creating a website. They are used by search engines to find information about our website. They also help to navigate within our page, as they help to create proper structure of our website. Headings also show the most important informations on our page.
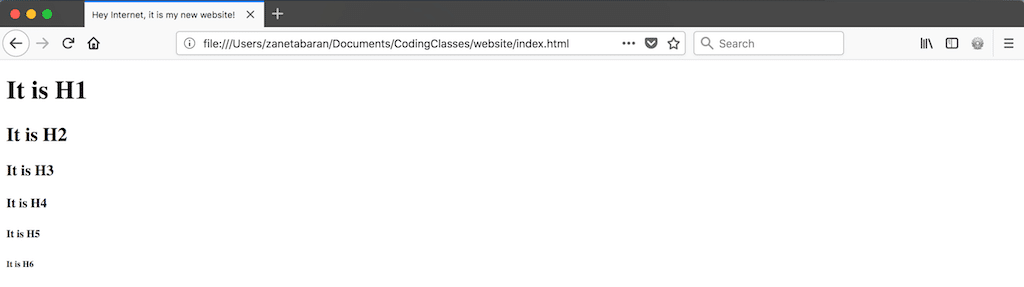
HTML has 6 types of headings
<h1></h1>
<h2></h2>
<h3></h3>
<h4></h4>
<h5></h5>
<h6></h6>
H1 is the most important heading and h6 is the least important heading. In the picture below, I have prepared an example how the headings look like in the browser and in the code.
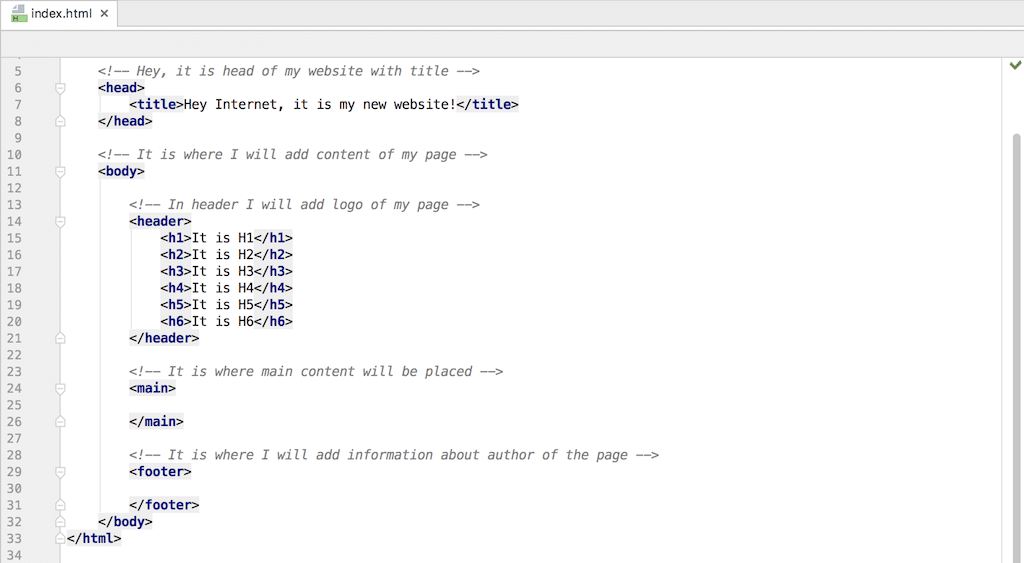
Let’s add the main heading to our header. We will use H1 in this case.
<body>
   <header>
      <img src="img/logo.png" alt="Logo of my page"/>
      <h1> My first page about coding! </h1>
   </header>
</body>
As you can see, we tell the browser what our page is about. We also send this information to search engines, such as Google in this case, and Google will find our page when someone looks for a page about coding.

Main
Now let’s focus on the main section of our page. Let’s add all the important information to this section. To be clear, we will talk about this part:
<body>
   <main>
   </main>
</body>
Section
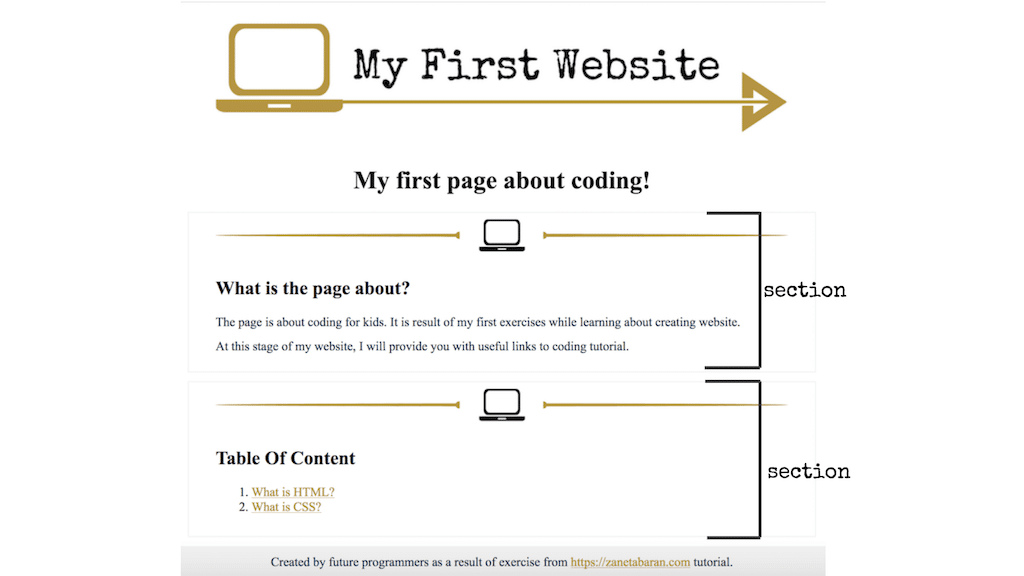
At this point we will use the <section> tag which helps us to make better structure of our page. Section will group our elements on the website into certain group information. Do you remember when I was talking about cleaning and tidying up? Again, our code needs to be clean, so we are trying to organise the information on our website into sections. Let’s create two sections. The sections will include image, list, heading and text.
<body>
   <main>
      <section></section>
      <section></section>
   </main>
</body>
Div
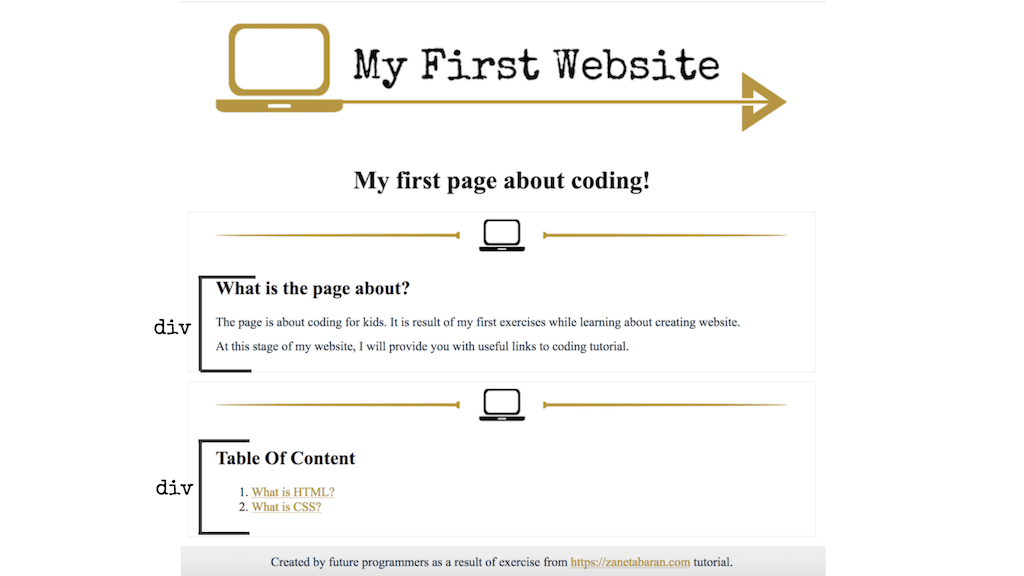
Div is the tag which you will use really often. It is another container, the most general container which you will use to wrap some elements on the page. What is the difference between section and div?
What is different between section and dev?
The Section tag defines group information on the website, such as chapters or certain parts of the website. The Div tag is used as sections in a HTML document. We use it more for grouping html elements, which we can use whilst styling – we will talk about it later. The Div tag doesn’t define the content of the website.
<body>
   <main>
      <section>
         <div>
         </div>
      </section>
      <section>
         <div>
         </div>
      </section>
   </main>
</body>
Paragraph
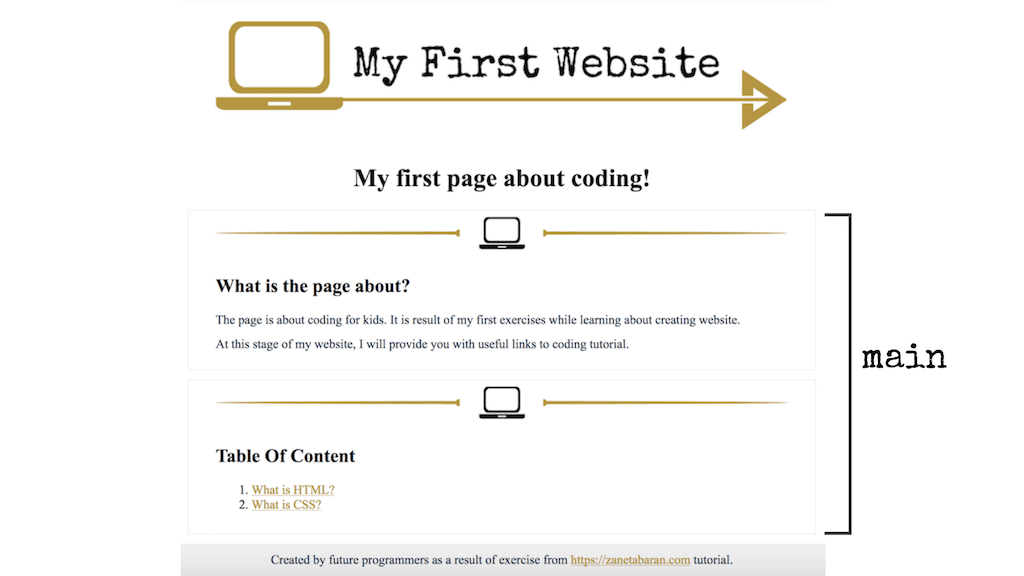
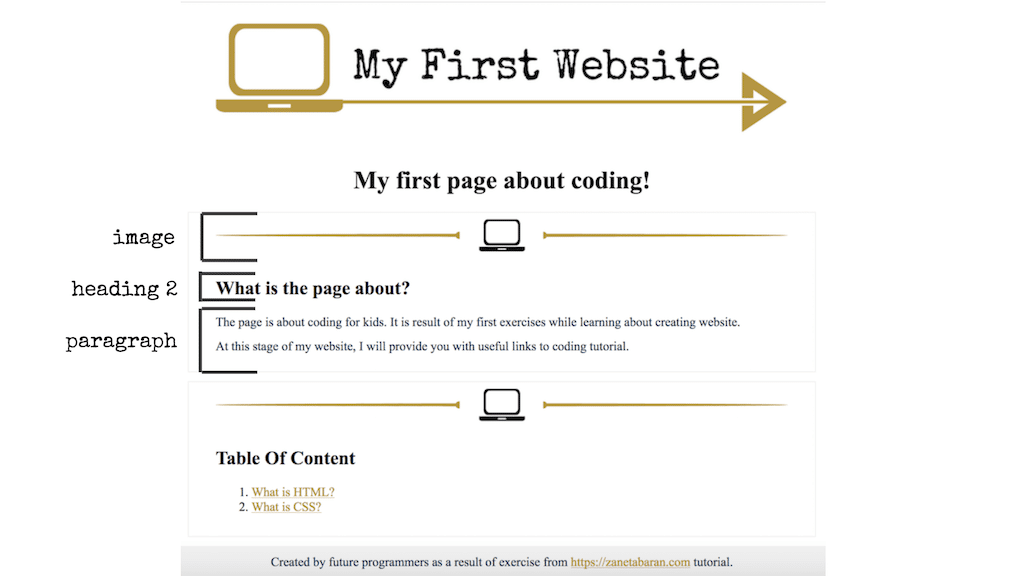
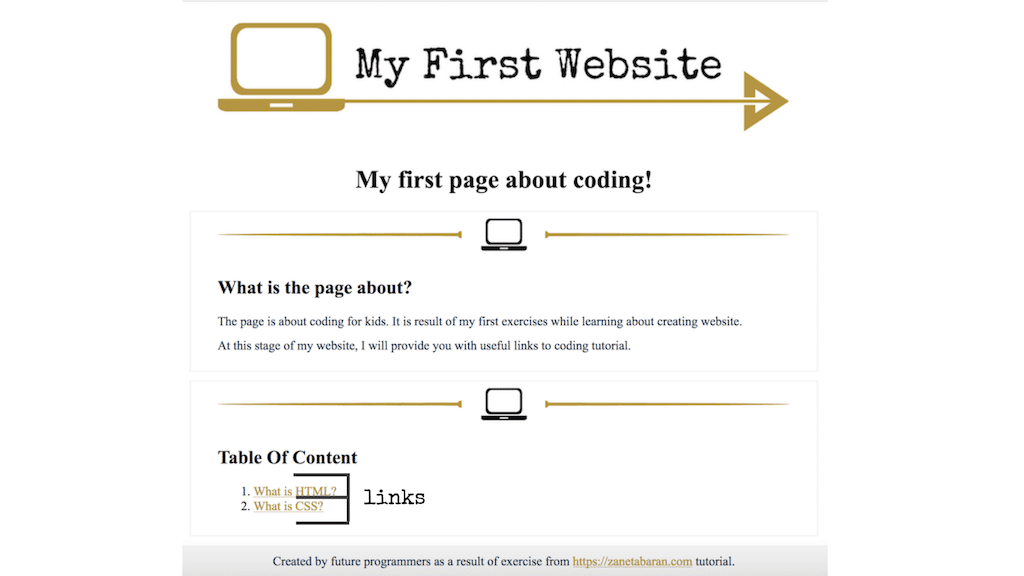
At the first section of our page, let’s describe what our page is about. In this case, let’s add paragraphs. HTML has a special tag for paragraphs and it is <p>. Additionally let’s add <h2> to describe the first section and the heading.png image that we created earlier. Notice, we have added the <img> tag outside of the <div> tag.
<body>
   <main>
      <section>
         <img src="img/heading.png" alt="Heading of section" />
         <div>
            <h2> What is the page about?</h2>
            <p> The page is about coding for kids. It is result of my first exercises while learning about creating website. </p>
            <p> At this stage of my website, I will provide you with useful links to coding tutorial. </p>
         </div>
      </section>
      <section>
         <div>
         </div>
      </section>
   </main>
</body>
Lists
In the second section, let’s add a kind of table for the content. In order to achieve it, we need to add a list of links. HTML language has three types of lists.
- unordered list — used to group a set of related items in no particular order
- ordered list — used to group a set of related items in a specific order
- description list — used to display name/value pairs such as terms and definitions
Information takes from WebPlatform
At this stage, let’s see how we can create lists and examples of how these lists look in the browser.
Unordered List
An unordered list presents element with a dot or bulletpoint at the beginning by default. The icon can be change, we will learn about it later on.

<ul>
   <li>
   </li>
   <li>
   </li>
 </ul>
Ordered List
An ordered list presents elements with a number at the beginning.

<ol>
   <li>
   </li>
   <li>
   </li>
 </ol>
Description List
A description list presents elements with titles. We can use this list to group elements.

<dl>
<dt>
</dt>
<dd>
</dd>
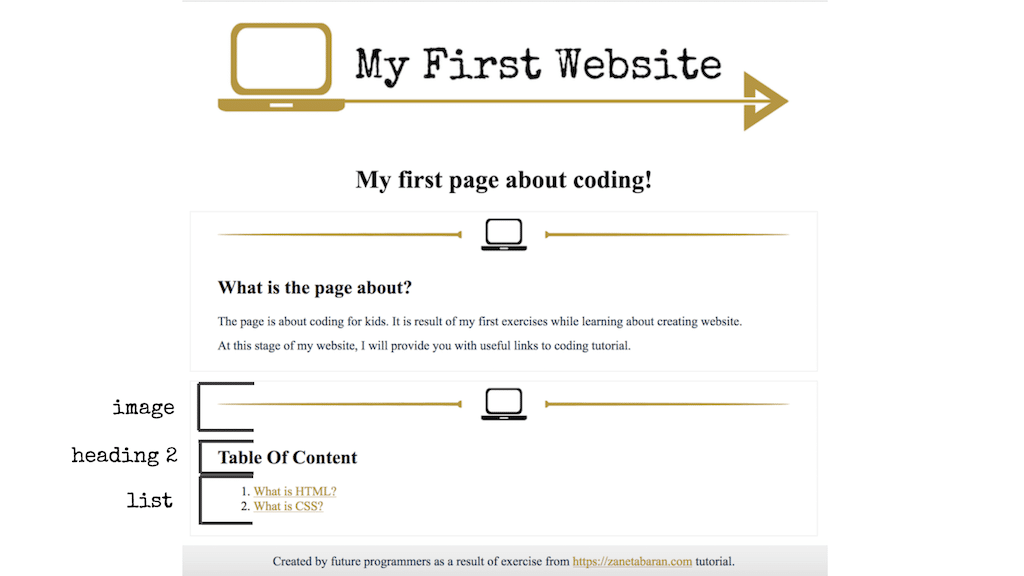
</dl>At this point, let’s use an ordered list for our Table of Contents. Before it, let’s add the <h2> tag to describe what our list will be about and the heading.png image which we created earlier.
<body>
   <main>
      <section>
         <img src="img/heading.png" alt="Heading of section" />
         <div>
            <h2> What is the page about?</h2>
            <p>The page is about coding for kids. It is result of my first exercises while learning about creating website. At this stage of my website, I will provide you with useful links to coding tutorial.</p>
         </div>
      </section>
      <section>
         <img src="img/heading.png" alt="Heading of section" />
         <div>
            <h2>Table Of Content</h2>
            <ol>
               <li>
               </li>
               <li>
              </li>
            </ol>
         </div>
      </section>
   </main>
</body>
Links
Uff, we have containers, sections, paragraphs, a list and now we are missing links. The main section of our page will include a kind of table of contents. At this part, we will provide links to other subpages. In order to link part of the text, we need to wrap the text into anchor.
<ahref="https://zanetabaran.com/">Useful information about coding</a>
In the example above, we add text “Useful information about coding” and this text will redirect us to https://zanetabaran.com/. Do you remember the img tag? It has special attributes, the same anchor tag has the attribute href. This attribute tells us where the link should redirect us.

Let’s add links to our page. At this point, we don’t have any subpages, so for href attribute we will use “#” value.
<body>
   <main>
      <section>
         <img src="img/heading.png" alt="Heading of section" />
         <div>
            <h2> What is the page about?</h2>
            <p>The page is about coding for kids. It is result of my first exercises while learning about creating website. At this stage of my website, I will provide you with useful links to coding tutorial.</p>
         </div>
      </section>
      <section>
         <img src="img/heading.png" alt="Heading of section" />
         <div>
            <h2>Table Of Content</h2>
            <ol>
               <li>
                  <a href="#">What is HTML?</a>
               </li>
               <li>
                  <a href="#">What is CSS?</a>
              </li>
            </ol>
         </div>
      </section>
   </main>
</body>
Footer
Great! We have a header and main content. What’s left? Footer! Do you remember that the footer is at the end of the page? Remember, that the footer is not part of the main section, it is a separate container. At this point, let’s just add information about who the author of the site is.
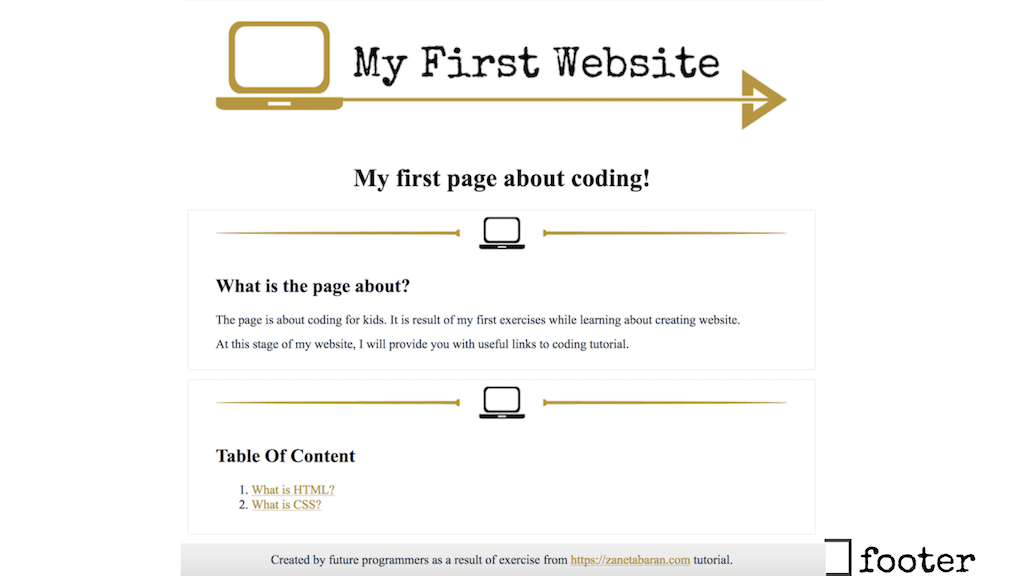
Let’s add information about author and the link to this tutorial.
<footer>
   <p> Created by future programmers as a result of exercise from <a href="https://zanetabaran.com">https://zanetabaran.com</a> tutorial. </p>
 </footer>
Preview of the page!
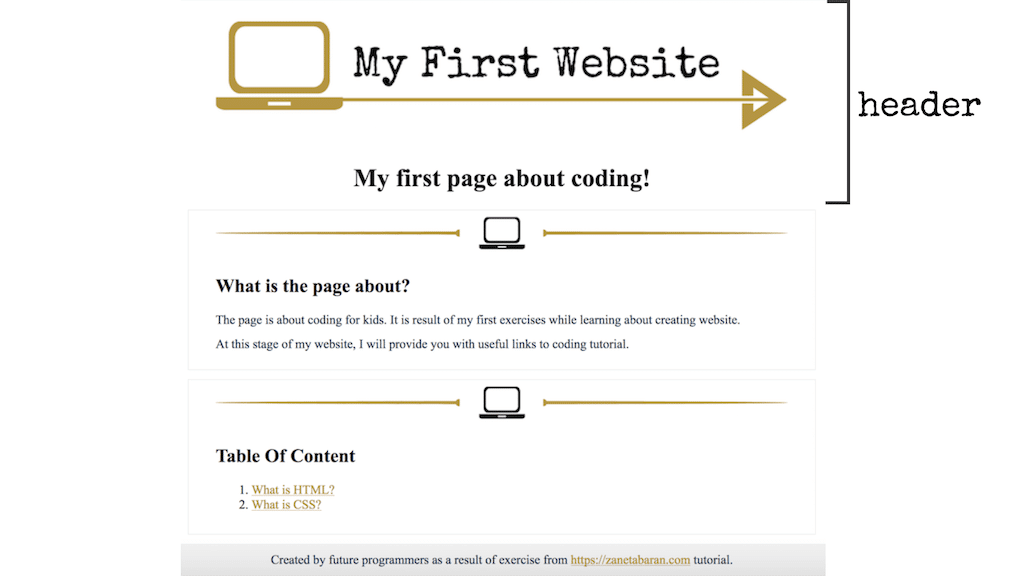
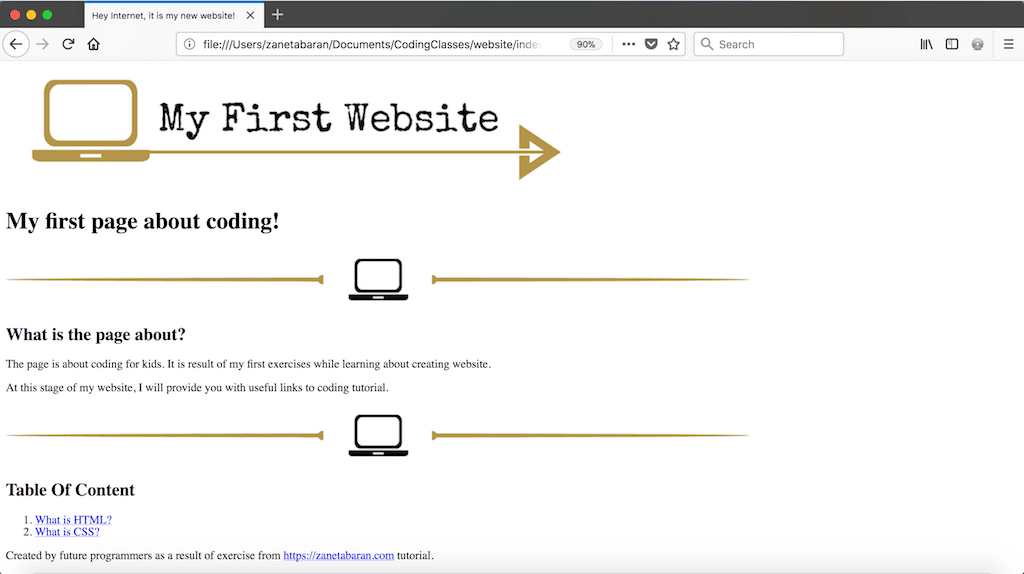
Now it is time to see the results of our work! Yeah! How to do it? Save the file, but before, check if you didn’t make any mistakes. This is how your file should look:
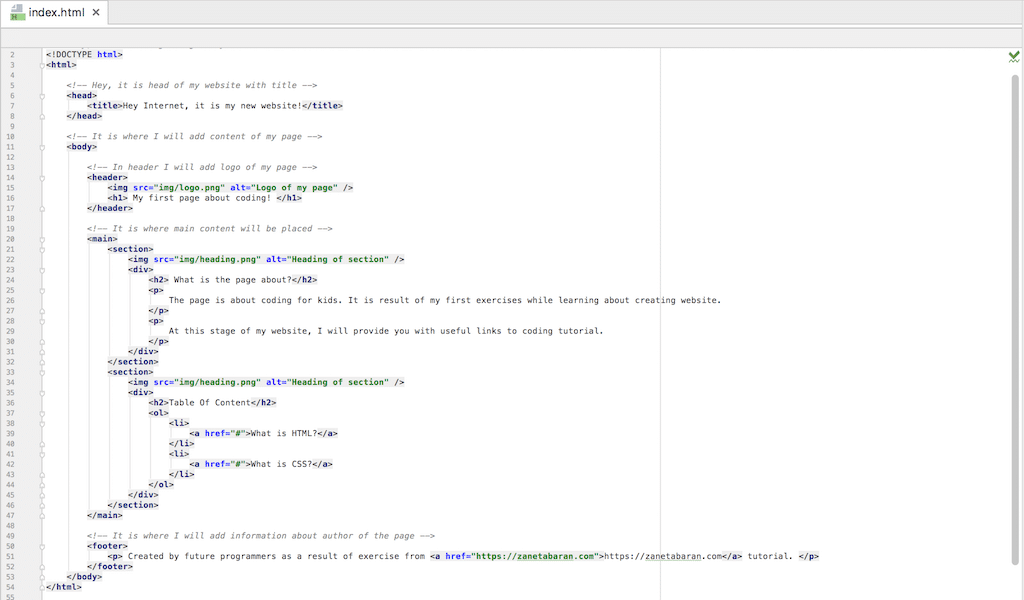
<!-- Hey, it is the beginning of my website! It is where html code starts! --><!DOCTYPE html><html><!-- Hey, it is head of my website with title --><head><title>Hey Internet, it is my new website!</title></head><!-- It is where I will add content of my page --><body><!-- In header I will add logo of my page --><header><img class="logo" src="img/logo.png" alt="Logo of my page" /><h1> My first page about coding! </h1></header><!-- It is where main content will be placed --><main><img src="img/heading.png" alt="Heading of section" /><div><h2> What is the page about?</h2><p>The page is about coding for kids. It is result of my first exercises while learning about creating website.</p><p>At this stage of my website, I will provide you with useful links to coding tutorial.</p></div></section><section><img src="img/heading.png" alt="Heading of section" /><div><h2>Table Of Content</h2><ol><li><a href="#">What is HTML?</a></li><li><a href="#">What is CSS?</a></li></ol></div></section></main><!-- It is where I will add information about author of the page --><footer><p> Created by future programmers as a result of exercise from <a href="https://zanetabaran.com">https://zanetabaran.com</a> tutorial. </p></footer></body></html>
Find the folder website on your laptop, open it and double click index.html.

The file should be opened in your default browser. Well done!! As you can see, the site doesn’t look pretty yet, but that is what we will do now! At this point, whenever you wish to see your changes, save the file and refresh the browser.
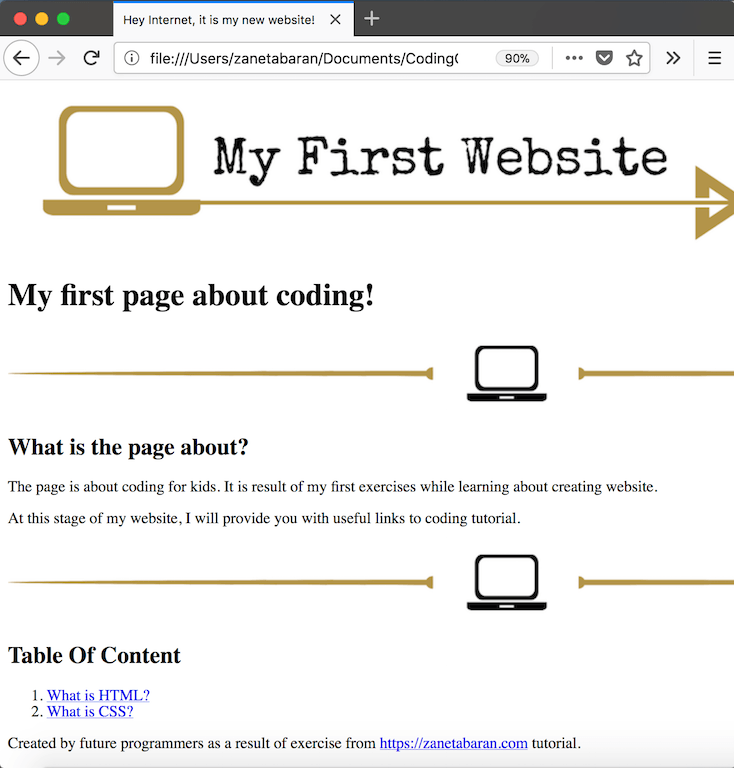
Desktop Preview
This is how your website will look on your laptop.
Tablet Preview
This is how your website will look on your tablet.
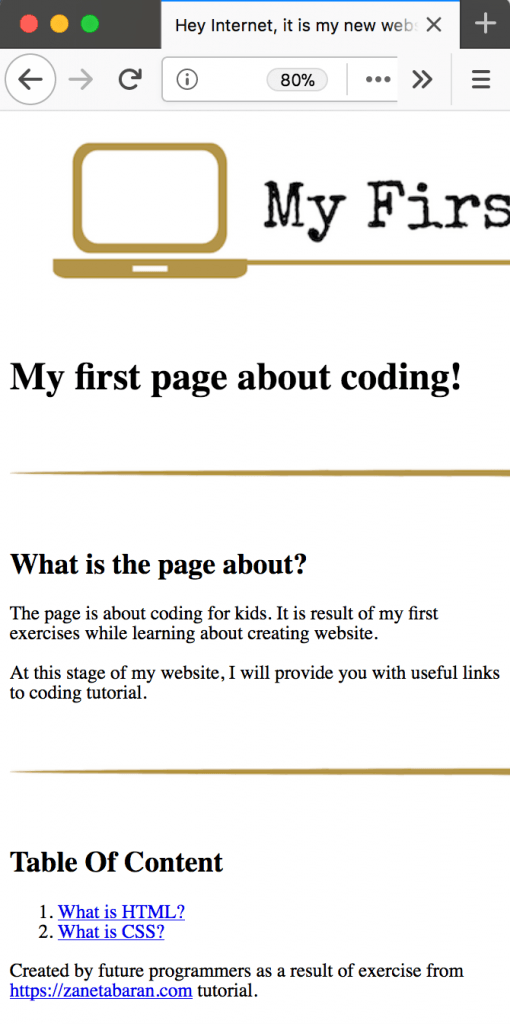
Mobile Preview
This is how your website will look on your mobile phone.
Useful HTML tags to remember
There was so much code during our lesson. To make it easier, I put all the HTML tags into a table which will help you to remember all of them.
<html> | Tells the browser that this is a HTML document |
<head> | Container for all the head elements, can include title, additional files and so on |
<title> | The title of the website shows in the browser tab and is used by search engines |
<body> | Contains all the contents of a HTML document, such as text, hyperlinks, images, tables, lists, etc. |
<main> | Specifies the main content of a page |
<footer> | Defines the end of the page, usually contains information about the author or contact details |
<header> | Contains the logo, welcoming message and navigation |
<img> | Adds images to the website |
<h1><h2><h3><h4><h5><h6> | Heading is used to define structure of the content |
<section> | Defines sections of the content |
<div> | Container is used to split html tags into groups |
<p> | Adds paragraphs |
<ul> | Unordered list |
<ol> | Ordered list |
<dl> | A list item within a list |
<dt> | Title of list item within a description list |
<dd> | A list item within a description list |
<a> | Adds links |
Next lesson will be about…?
Yeah! We have our first content of the page. We know how to create file structures, what HTML is about and how to add HTML tags. As you can see, our webpage doesn’t look pretty, but it is what we will work on during next lesson – we will learn about CSS and styling. Ready?!
To download a package of all our files – Coding Classes For Kids – Website Content – HTML Tags – Basic Tutorial click Website Website Html Tags.
Zaneta loves challenges so deciding about career path she has chosen typical male industry. Woman who codes. Every 1-2 years she lives in different part of the world. Gym dates is something what she specialised in. Healthy lifestyle, extreme sports and motorbikes have stolen her hear years ago.