- Coding Classes For Kids – How To Create My First Website? – Basic Tutorial
- Coding Classes For Kids – Website File Structure – Basic Tutorial
- Coding Classes For Kids – Website Skeleton – HTML Basic Structure – Basic Tutorial
- Coding Classes For Kids – Website Content – HTML Tags – Basic Tutorial
- Coding Classes For Kids – Styles Introduction – CSS Selectors & Properties – Basic Tutorial
- Coding Classes For Kids – How To Create My First Website? – Wrap Up
It is difficult to believe, but we managed to reach last step of our Basic Tutorial – How To Create My First Website – my first online coding course 🙂 This last post will wrap up everything that we have learned and prepare you for the continuation of this series. You can also check our page by click website. Let’s start our last lesson then!
Remember, if you have any questions during the course, feel free to ask me in the comment section below.
Contents
Online Coding Course – Basic Tutorial Review
First of all let’s remind ourselves of the classes during our online coding course. Do you remember the graph below from our first lesson?
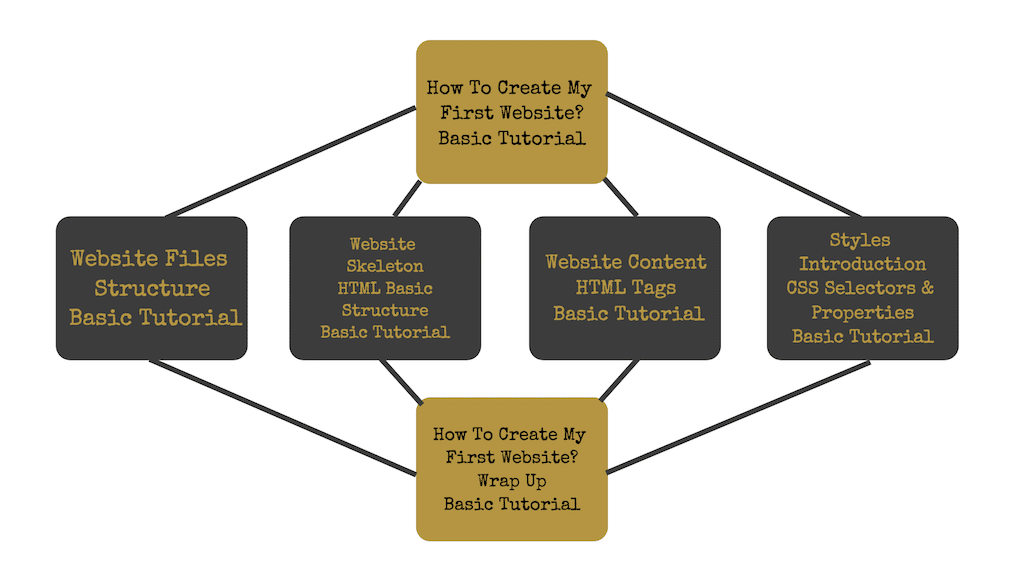
How to create my first website?
In the first lesson we were taking about the basic rules and steps to create your first website. Let’s quickly go through the most important points.
First of all, we started with the explanation of how do websites work. When two laptops are connected to the Internet, they can send information to each other, can talk to each other and can see each other. Servers are special computers that are connected to the Internet directly, when our laptops are connected to the Internet by other systems (Internet Service Provider – ISP).
When you type a page address in the browser, the browser sends a message to the server where the page is located. The server sends the files of the page back to the browser and the browser translates the files (code) into a page view which you can see in the browser. All of it happens really quickly, like in a couple of seconds.

In this lesson, we also prepared a mockup and design of our page. A mockup is a simple drawing which presents elements on the site. Design is the final look of the website.
We were also talking about the development process and going live step. Do you remember that you need a hosting (server for your page) and domain (address url for your page) to make it visible on the Internet? We also said that during this tutorial we will not focus on it.
Website File Structure
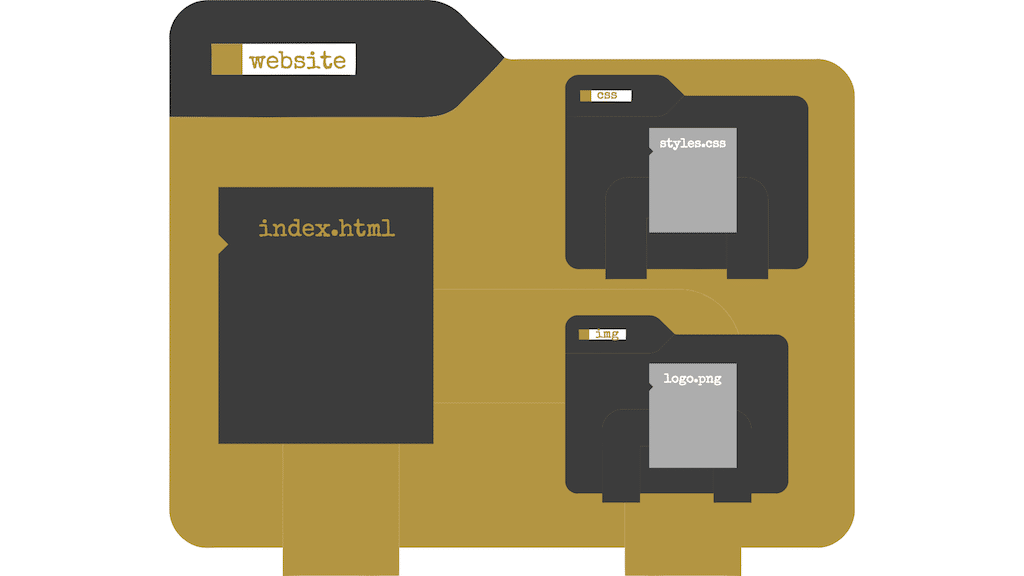
In the second lesson, we were learning about file structure. At this point you should have a main folder website, which includes two other folders img for all images and css for css files. Inside of the website folder, you should have index.html which is the starting point for the website and it includes HTML code. Inside the img folder you should have all your images such as logo.png and heading.png. Inside the css folder you should have the styles.css file which includes CSS code and takes responsibilities for the styling of the site.
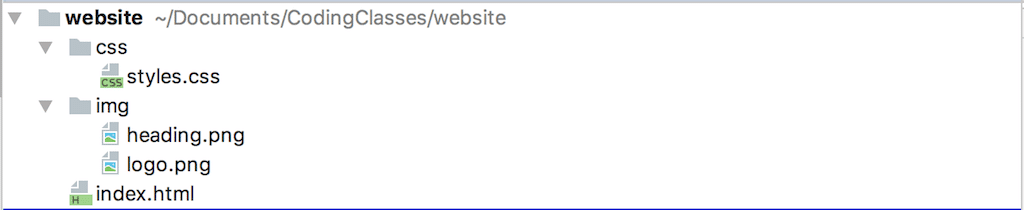
At this stage of the tutorial you should have the following files:
Website Skeleton – HTML Basic Structure
At the third lesson, we were talking about HTML language and basic structure of the website.
HTML means HyperText Markup Language and it is a language which gives structure to our website. This language translates our code to a language which is understood by the browser. The browser will read the HTML and display the elements which we want to show.
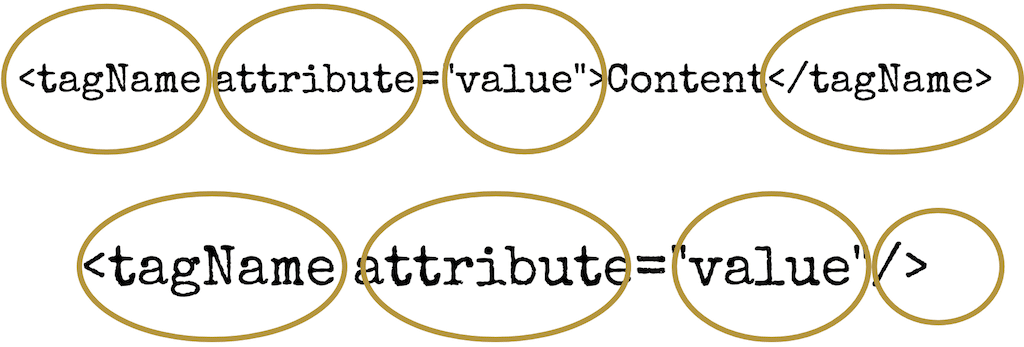
We were also talking about HTML tags. HTML has special tags which have important meanings. Some elements have an opening tag and a closing tag, some tags are self-closing. Some tags can have attributes with a value assigned to it.
At this lesson we were also talking about intending to make our code clean and tidy.

We also explained what containers mean and we added containers to our page as head, body, header, main and footer.

Website Content – HTML Tags
In the class about HTML tags, we added content to our page. That’s the HTML tags that we were talking about:
<html> | Tells the browser that this is a HTML document |
<head> | Container for all the head elements, can include title, additional files and so on |
<title> | The title of the website shows in the browser tab and is used by search engines |
<body> | Contains all the contents of a HTML document, such as text, hyperlinks, images, tables, lists, etc. |
<main> | Specifies the main content of a page |
<footer> | Defines the end of the page, usually contains information about author or contact details |
<header> | Contains logo, welcoming message and navigation |
<img> | Adds images to the website |
<h1><h2><h3><h4><h5><h6> | Headings used to define the structure of the content |
<section> | Defines sections of the content |
<div> | Container used to split html tags into groups |
<p> | Adds paragraphs |
<ul> | Unordered list |
<ol> | Ordered list |
<dl> | A list item within a list |
<dt> | Title of list item within a description list |
<dd> | A list item within a description list |
<a> | Add links |
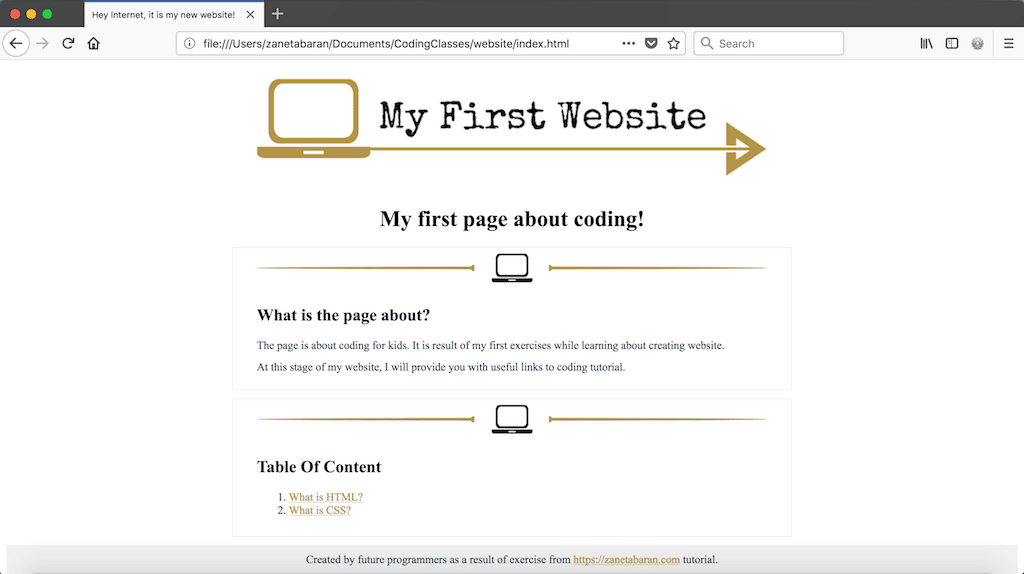
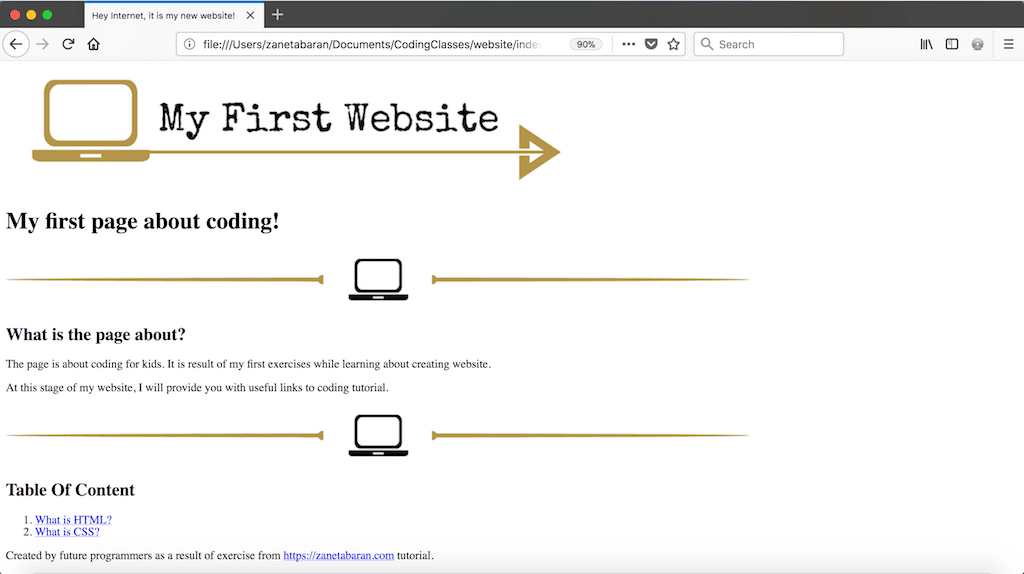
We also checked how the site looks without styles:
Styles Introduction – CSS Selectors & Properties
In the last lesson, we were talking about CSS language. Cascading Style Sheets is the language that changes what HTML code looks like, it describes how HTML elements are displayed on the page. This code is stored in the CSS files, in our case it is styles.css.
We connected HTML with CSS by adding this to our <head> tag.

We also explained what the CSS code looks like.
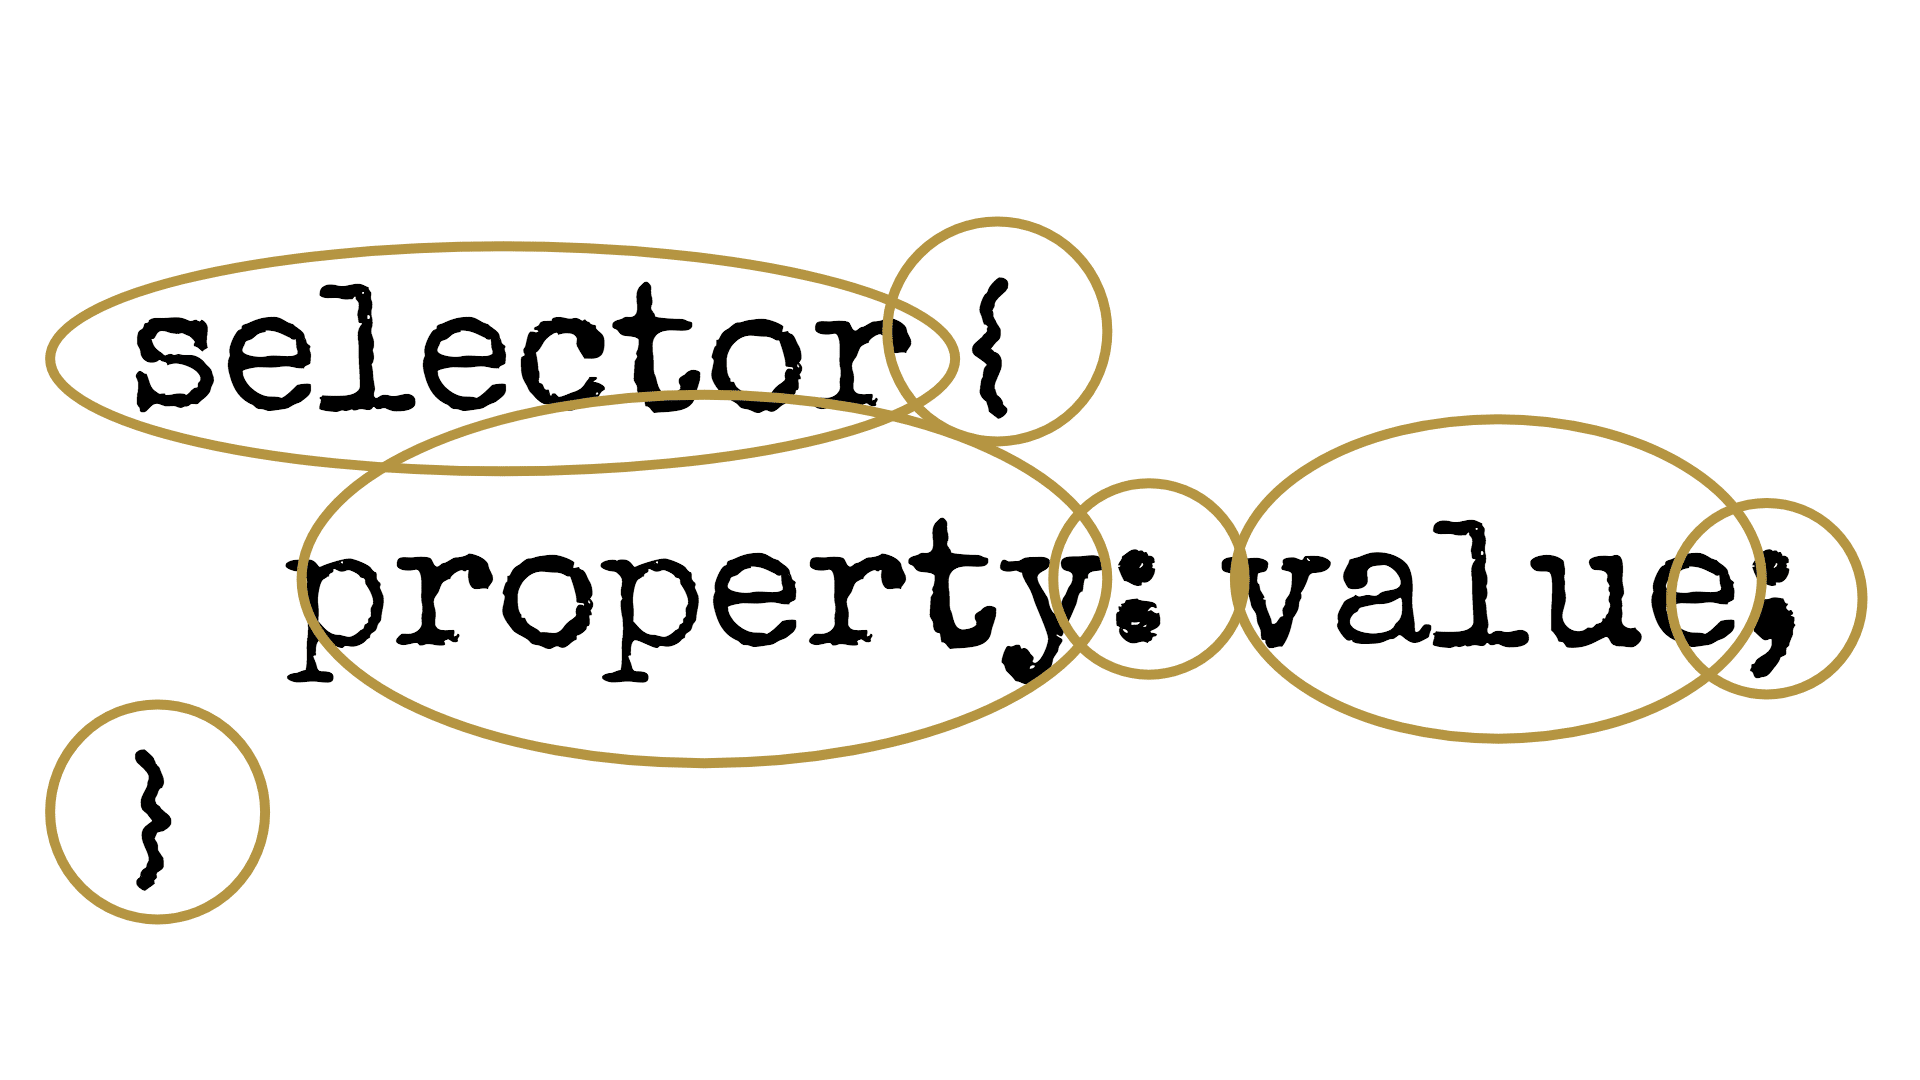
- The selector identifies which parts of the content the rules should apply to. The rules that are inside the opening and closing curly brackets ‘{ }’ are applied to any items matching the selector
- A property is an aspect of the presentation we would like to set
- The value is how we would like the property to behave
- A semicolon is included at the end of each property, value pair or to separate it from the next pair
We also mentioned about CSS formatting, where we should use indentation.
Finally we went through selectors and properties of CSS code. Remember, that we covered only the basic part of CSS language. There is much more to learn.
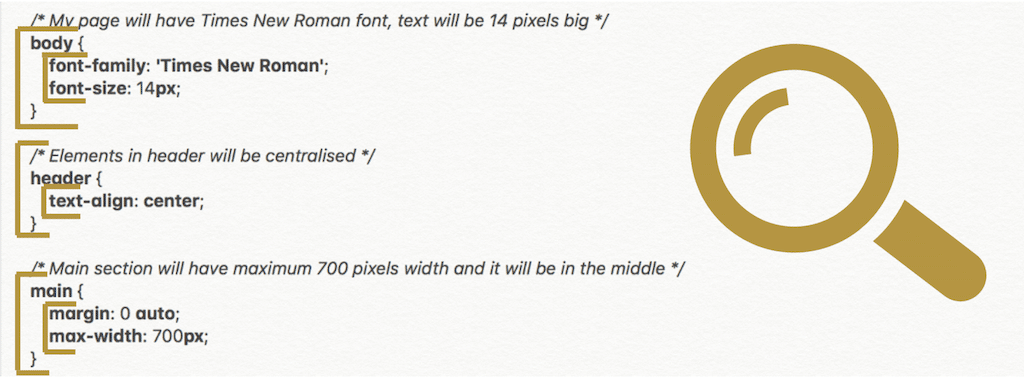
At the end of the lesson we checked the final results of our work:
That’s all CSS selectors and CSS properties which we were talking about.
CSS selectors
| Directly Pointing Elements | |
| Classes | |
| Ids | |
| Descendant Elements | |
| Multiple Selectors | |
CSS properties
| Text Properties |
| ||||||||
| Colour Properties |
| ||||||||
| Spacing Properties |
| ||||||||
| Width & Height | Defines the width/height of an element | ||||||||
| Max-width & Max-height | Defines the minimum width/height of an element |
What next in our online coding course…?
Congratulations! You have created your first website and finished our online coding course. Well done! There is still so much to learn about CSS and HTML. Also there are topics like colours, unit measurements, responsive design, flexbox, BEM and so on. We will cover it in the future online coding course as a continuation for How to create my first website? – Basic Tutorial. See you soon!
To download packages of all our files – Coding Classes For Kids – Basic Tutorial click Website.
If you like the course, I would be more than happy if you could share it on Facebook, Twitter, Instagram or any other place. You can also send a link with the course to your friends and family. I hope more kids will learn about coding.
If you have any questions, feel free to leave a comment below.
Zaneta loves challenges so deciding about career path she has chosen typical male industry. Woman who codes. Every 1-2 years she lives in different part of the world. Gym dates is something what she specialised in. Healthy lifestyle, extreme sports and motorbikes have stolen her hear years ago.