- Coding Classes For Kids – How To Create My First Website? – Basic Tutorial
- Coding Classes For Kids – Website File Structure – Basic Tutorial
- Coding Classes For Kids – Website Skeleton – HTML Basic Structure – Basic Tutorial
- Coding Classes For Kids – Website Content – HTML Tags – Basic Tutorial
- Coding Classes For Kids – Styles Introduction – CSS Selectors & Properties – Basic Tutorial
- Coding Classes For Kids – How To Create My First Website? – Wrap Up
We have been talking about the file structure of our website, HTML content and HTML tags. We also already had a first look at our website in the browser. As you could see, the website didn’t look so pretty. It is time for adding some colours and nice looks. Are you ready?
Remember, if you have any questions during the course, feel free to ask me in the comment section below.
Contents
What is CSS?
Let’s start with definition of CSS. Cascading Style Sheets is language which changes what HTML code looks like; it describes how HTML elements are displayed on the page. This code is stored in the CSS files. Do you remember when I was talking about file structure? I mentioned we will store css files in the css folder and they will have the extension css.
Our current site has no styles. At this point, we will start adding styles to our page to make it look pretty.
Adding CSS files to your website
First of all, we need to create a new file to add our new code. In folder css, let’s create a style.css file.

Do you remember when I was saying that index.html file is our start file? In this case, in order to make our styles appear on the page, we need to connect the CSS file into our index.html file. Do you also remember when I was talking about the <head> tag? This tag includes information about the page that doesn’t show in the browser. In this tag, we will add a special <link> tag in order to connect our CSS file with index.html.
<head>
   <title>Hey Internet, it is my new website!</ title>
   <link type="text/css" rel="stylesheet" href="css/styles.css" media="all" />
</head>
As you can see, it is a self closing tag with three attributes. Attribute type tells us what kind of content we will link to our page. In this case it is “text/css” file. Another attribute is rel which specifies the relationship between the current document and the linked document, in our case the CSS document is a stylesheet for our HTML document. And the last attribute href shows where the file is located, in our case it is in the css folder and the name of the file is styles.css. The media attribute allows us to define which media types the rules in this style sheet should be applied.

The media could be one of the following:
- all – for all devices
- screen – for computer screens
- print – for when the document is printed
- speech – for when the document is spoken (eg. when using a screenreader)
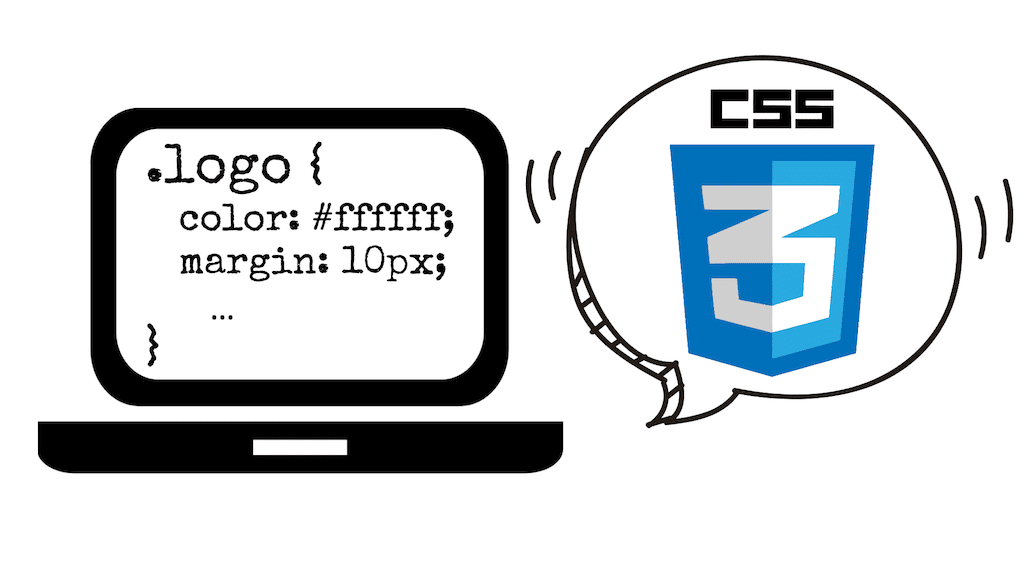
How CSS code looks?
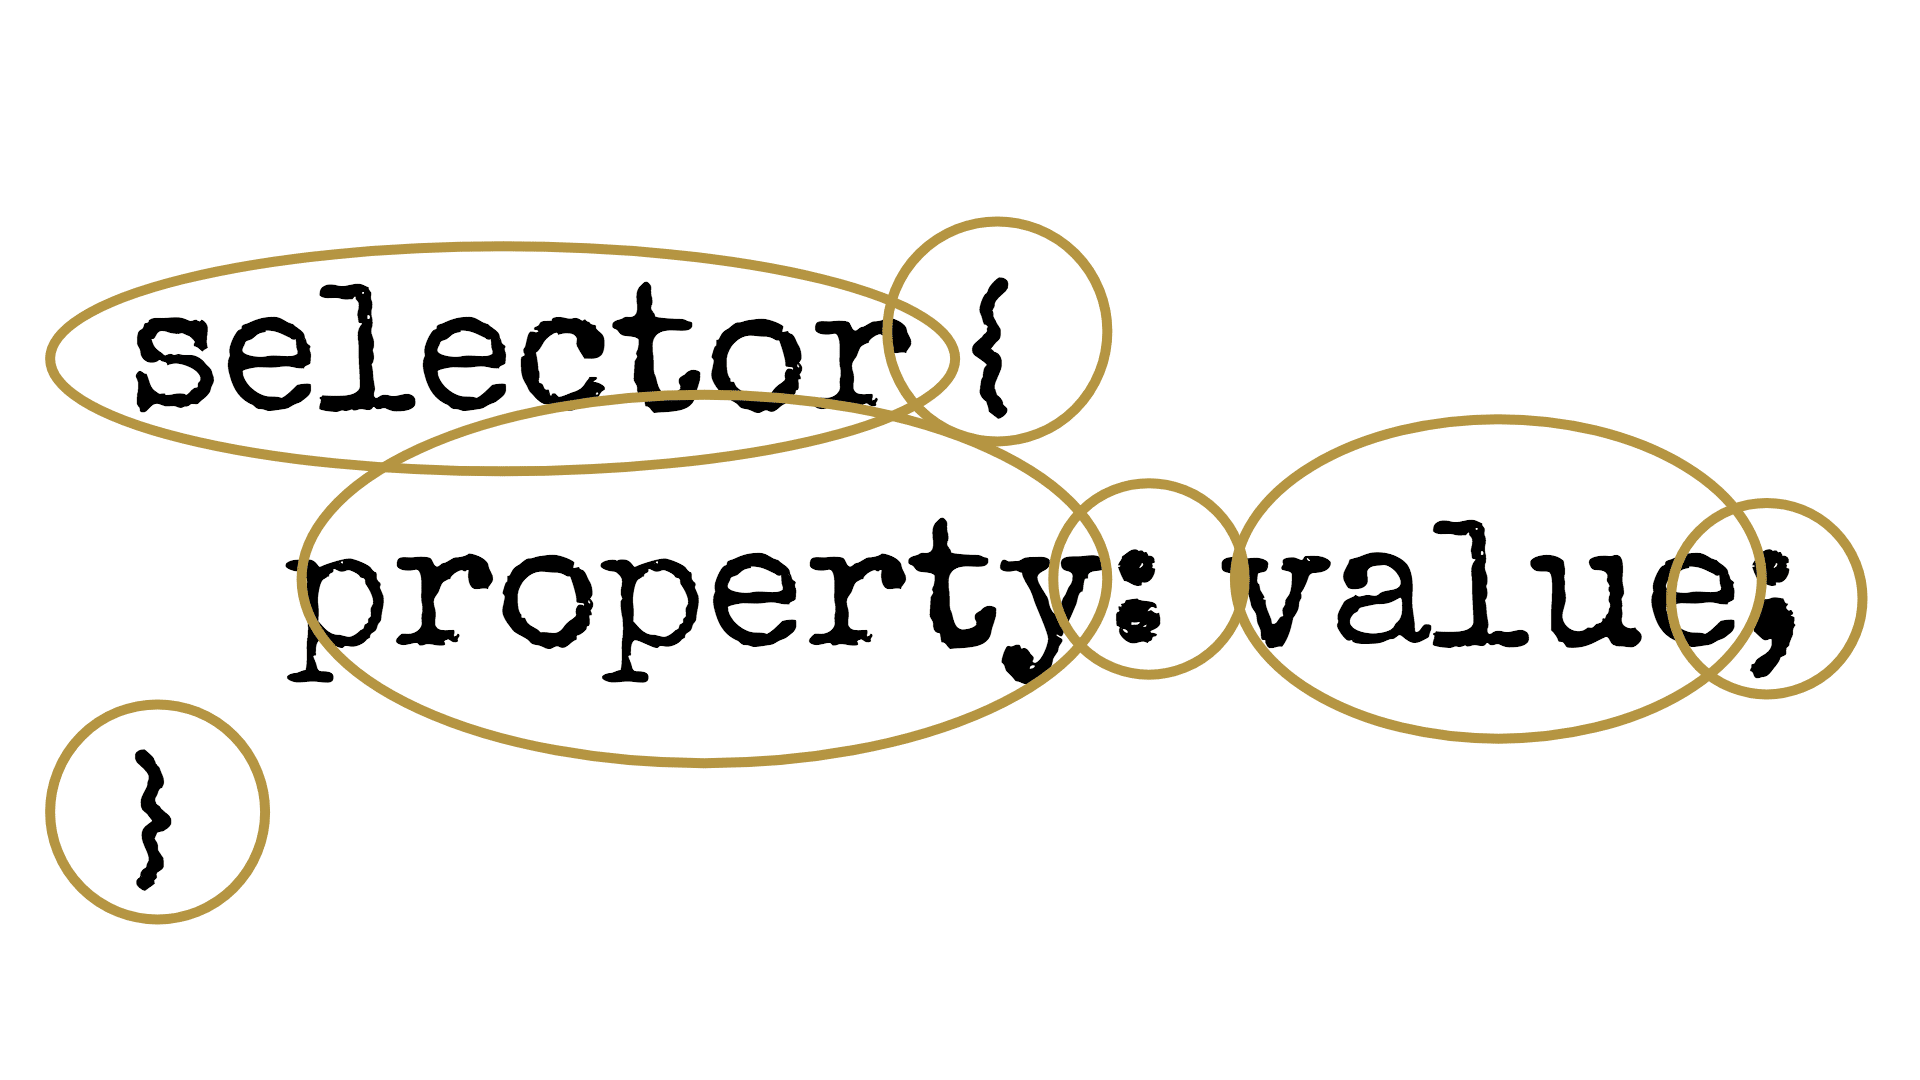
selector {
   property: value;
}- The selector identifies which parts of the content the rules should apply to. The rules that are inside the opening and closing curly brackets ‘{ }’ are applied to any items matching the selector.
- A property is an aspect of the presentation we would like to set.
- The value is how we would like the property to behave.
- A semicolon is included at the end of each property, value pair or to separate it from the next pair.
CSS formatting
Do you remember when I was taking about code formatting for HTML code? The same applies to CSS code. We need to keep code clean and add indentation. The property with value is indented. Moreover, try to keep the structure of adding selectors, starting from more general to more specific.
CSS Selectors
In order to style html elements, we need to point to them and that is where we use selectors, to choose elements that we want to style. There are a couple of ways to do it. I will mention here just one example.
Directly Pointing Elements
Example of CSS code:
p {
   ...
}
Example of HTML code:
<p> It is part of the code which I will style </p>In this case, we use the point tag <p>. Notice, the structure of the CSS code. First all of, we have the tag name which is p in our case. We skip < and >. Then we open and close brackets { }. We will add content later on. This part of the code means – apply CSS styles to all <p> elements.
Classes
Example of CSS code:
.items {
   ...
}
Example of HTML code:
<p class="items"></ p>
<div class="items"> </ div>
We can also point to elements by using classes. We need to add a special attribute”class” to our HTML code. It is important to remember that classes are not unique. You can add the same class to different elements and the CSS code will apply to all of them. Notice, the structure of the CSS code. At the beginning we added dot, which tells us that after the dot we will have a class name. For HTML code, we have attributed class and name of class. This part of the code means – apply CSS style to all elements with the class “items“.
At this point, let’s add class to our HTML file. We will use it later on. We will add the class “logo”.
<header><img class="logo" src="img/logo.png" alt="Logo of my page" /><h1> My first page about coding! </h1></header>
Ids
Example of CSS code:
#image-of-coding-tool {
   ...
}
Example of HTML code:
<img src="xxx" alt="xxx"id="image-of-coding-tool"/>Ids are unique. We can only use one of the same ids on the page. Notice, the structure of the CSS code. At the beginning we added hash, which tells us that after the hash we will have an id name. For HTML code, we add the id attribute to the element with id name. This part of the code means – apply CSS style to all elements with id “image-of-coding-tool“.
Descendant Elements
Example of CSS code:
footer p {
   ...
}
Example of HTML code:
<footer>
   <p> It is part of the code which I will style </p>
</footer>
In this case, descendant elements inside another element should be styled. On the example above, the <p> tag will be styled inside the <footer> tag.
Multiple Selectors
Example of CSS code:
section, div {
   ...
}
Example of HTML code:
<section>
   <div> It is part of the code which I will style </div>
</section>
The styles above will be applied to the <section> tag and the <div> tag. Notice the comma between section and div, it means ‘and’.
More selectors
Would you like to know more selectors? Check out CSS selector references table. For now, we will focus on these three basic once.
CSS Properties
CSS properties is a huge topic, but what is that about? Properties define which aspect of the selector (HTML element) will be changed visually. We will focus only on basic ones at this stage.
How are properties added to the CSS code?
To start, let’s make sure that we know how to write CSS code. We have been talking about selectors and properties, at this point, let’s try it on the example:
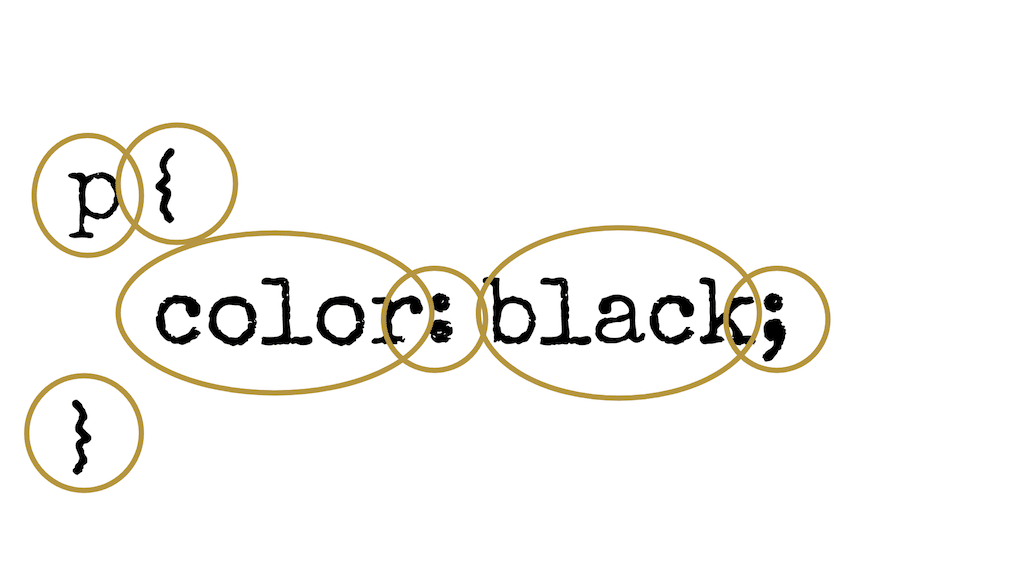
p {
   color: black;
}
There are a couple of things which you need to notice:
- First of all, we have a selector at the beginning, in our case it is p, but it can also be class or id.
- Then we open { and close }, inside we will add styling instructions.
- color is a property which tell us what aspect of the element we will style, in our case, it is color.
- After the name of the property, we always add a colon :
- Then we add the value of the property, which is black in our case.
- And at the end we always add a semicolon ;
All of this is really important and it is really easy to forget. Pay attention to these details.
Text Properties
At this point, we will change how the text on our page looks. We will only focus on selected properties.
Font Family
Font-family property defines what font we will apply for our text. At this stage we will use only the installed fonts on your laptop. The most common fonts are Times New Roman and Arial. There is also a way to add uncommon fonts which are not installed on laptops, but we will learn about it another time. Let’s define the font then. Open the style.css file and add the following code:
body {
   font-family: 'Times New Roman';
}
Do you remember the body tag? This CSS code means that the font named Times New Roman will be applied to the body tag, which means this font will be visible across our page.
Font Size
Font size defines the size of the font. It can be defined in several measurement units, during our classes we will use pixel – px. Pixel is like a dot on the screen. For more units, check out CSS Units page. Let’s change the font size on our page.
body {
   font-family: 'Times New Roman';
   font-size: 14px;
}
footer {
   font-size: 12px;
}
As you can see, we added 14px for the font across the page, but we also added a special font size for footer tags, which is 12px. Feel free to change other elements on your site.
Font Weight
Font weight specifies how thick the lines of the characters are. You can assign the following values:
- lighter
- normal
- bold
- bolder
It is worth a mention that some elements are bold by default, like h1 tag for example. Let’s try!
ul li {
   font-weight: bold;
}
At this point, we bolded elements of unordered lists across the page.
Text Align
Text align property defines the position of the text. It can have the following values:
- left
- center
- right
- justify
p {
   text-align: justify;
}
header {
   text-align: center;
}
footer p {
   text-align: center;
}
The code above defines that all text included in the p tag will be justified, however, elements in the header tag and paragraphs inside the footer tag will be centralised.
Colour Properties
Colour properties are the most common CSS properties. It is also a big section as there are a couple of things which you need to remember. As you could see in previous examples, colours can be written in CSS code like blue, yellow and so on. However not all colours will be understood by the browser. In order to make sure that the browser understands our code, we write the code in hexadecimal number. We will not go more into details here. Everything that you need to remember is that each colour has its own hex number. For example, the colour black has a number #000000 and the colour white has number #ffffff. You don’t need to remember these numbers, you can use Color Hex site to find the number of the colours.
Color
The color property will define the colour of our text. Notice that we use “color” from American English, instead of “colour” from British English.
p {
   text-align: center;
   color: #123456;
}
a {
   color: #b49543;
}
The code above will add dark blue colour to all <p> tags and gold colour for all links.
Background Color
Background color will define the colour of the background for selected elements.
footer {
   background-color: #fafafa;
}
At this point, we have added light grey background for footer.
Spacing Properties
Spacing is another huge topic. We will talk about it later on as well. However at this point, let’s get familiar with CSS properties which are related to spacing.
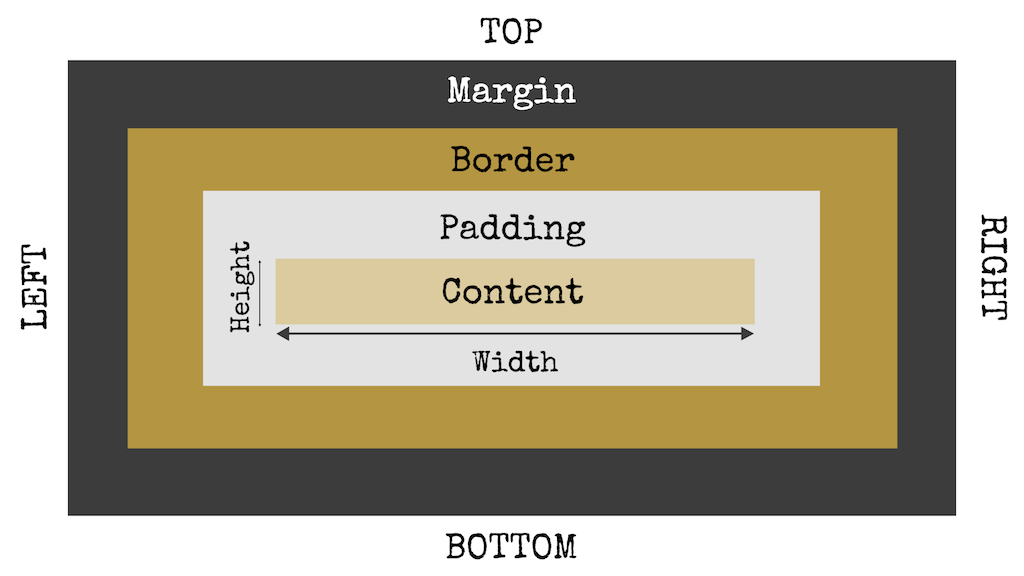
Padding
Padding is the space around the content, however this additional space is added inside tag. No worries, it will be clearer when we check out the example. Padding can be defined in several units. For more units, check out CSS Units page. In our classes we will use pixels.
Paddings can be defined in several ways:
- single value – it will be applied to every side of the element.
- two values – in this case the first value specifies the top and bottom side and the second value the left and right side of the element.
- three values– in this case the first value specifies the top, the second value the left and right side of the element and the third values the bottom.
- As four values – in this case the first applies to the top, the second to the right, the third to the bottom and the fourth to the left
footer p {
   text-align: center;
   padding: 10px;
}
section {
   padding: 0 30px 10px 30px;
}
padding: 10px; is exactly the same what padding: 10px 10px 10px 10px;
At this point, we have added 10pixels of space inside a paragraph. We also added no space on the top section, 30 pixels on the left inside section and its content, 10 pixels on the bottom and 30 pixels on the left inside section and its content. Now, you will see that the space is bigger inside the paragraphs and sections.
Margin
Margin is similar to padding. It affects the spacing around the content, outside of the element. It is a second area outside the padding. When the element has background colour, you will see that the space outside of the background colour and other elements are bigger. Margin can be defined in several units. For more units, check out CSS Units page. In our classes we will use pixels.
Margins can be defined in several ways:
- single value – it will be applied to every side of the element.
- two values – in this case, the first value specifies the top and bottom side and the second value the left and right side of the element
- three values– in this case the first value specifies the top, the second value the left and right side of the element and the third value the bottom
- As four values – in this case the first applies to the top, the second to the right, the third to the bottom and the fourth to the left
main {
   margin: 0 auto;
}
p {
   text-align: center;
   color: #123456;
   margin: 10px 0;
}
section {
   padding: 0 30px 10px 30px;
   margin: 10px 0;
}
margin: 10px; is exactly the same what margin: 10px 10px 10px 10px;
margin: 0 auto; centralises containers
At this point, we centralised the main tag, we have added 10pixels of space outside of paragraph and section on the top and bottom. Now, you will see that the space is bigger between paragraphs/section and other elements on the page.
Border
Border is the space between padding and margin. Border property allows us to add a line around elements.
Border property can have various values:
- width of border
- colour of border
- style of border (none, dotted, dashed, solid, double, groove, ridge, inset, outset)
section {
   padding: 0 30px 10px 30px;
   margin: 10px 0;
   border: 1px solid #f1f1f1;
}Width & Height
Width defines the element’s width, height defines the element’s height. In our case, let’s set 700 pixels for the width of the logo image. Notice, we point at the element by the class “logo“.
.logo {
   width: 700px;
}
Max-width & Max-height
Max-width defines the maximum width of an element. Max-height defines the maximum height of an element.
main {
   margin: 0 auto;
   max-width: 700px;
}
img {
  max-width: 100%;
}
At this point we have added a maximum width of 700 pixels for the main tag and a maximum width of 100% of browser width for images across the page. If we do not add max-width for images, the image can be bigger than the browser and it can be cut.
CSS Comments
Do you remember when we were talking about comments in HTML code? We can also add comments to our CSS code. We add them as below:
/* It is comment in my CSS code */Let’s add some comments to our style.css file. Check every single line as it will be our final code.
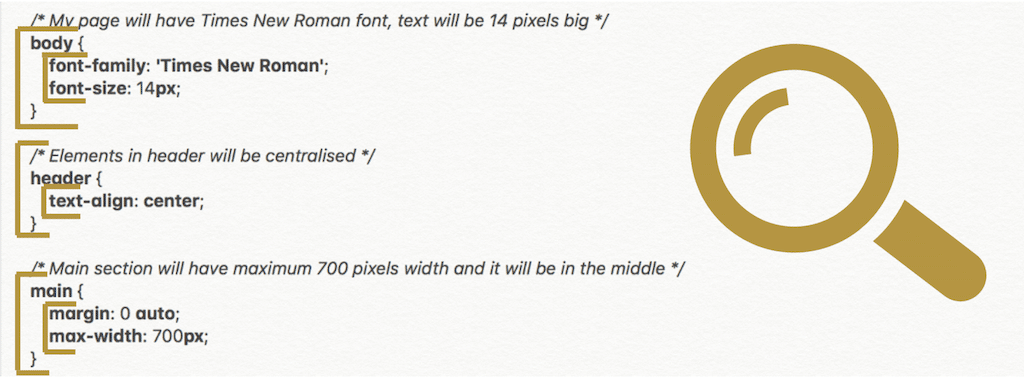
/* It is the beginning of my style file */

/* My page will have Times New Roman font,
text will be 14 pixels big */
body {
   font-family: 'Times New Roman';
   font-size: 14px;
}

/* Elements in header will be centralised */
header {
   text-align: center;
}

/* Main section will have maximum 700 pixels width
and it will be in the middle */
main {
   margin: 0 auto;
   max-width: 700px;
}

/* Footer will have light grey background */
footer {
   background-color: #f1f1f1;
}

/* Paragraphs will the footer will be centralised
and will have padding (space between text and the end of paragraph)
10 pixels around */
footer p {
   text-align: center;
   padding: 10px;
}

/* Paragraphs will be justify,
they will have dark colour and
there will be 10 pixels of space outside paragraphs,
only on the top and bottom, no space on the left nor right */
p {
   text-align: justify;
   color: #123456;
   margin: 10px 0;
}

/* Links will have colour gold */
a {
   color: #b49543;
}

/* Maximum width of images on the website will be 100% of the browser view */
img {
   max-width: 100%;
}

/* Defines width for logo image */
.logo {
   width: 700px;
}

/* And section will have dark grey border,
1 pixel big and solid.
It will also have none padding (space) on the top,
30 pixels padding (space between section end and content) on the right,
10 pixels padding (space between section end and content) on the bottom
and 30 pixels padding (space between section end and content) on the left.
 Moreover it will have 10 pixels margin
(space outside of section and another elements) on the top and bottom,
no margin on the left nor right */
section {
   border: 1px solid #f1f1f1;
   padding: 0 30px 10px 30px;
   margin: 10px 0;
}

/* The lists will be bolder than rest of the text */
ul li {
   font-weight: bold;
}
Preview of the page!
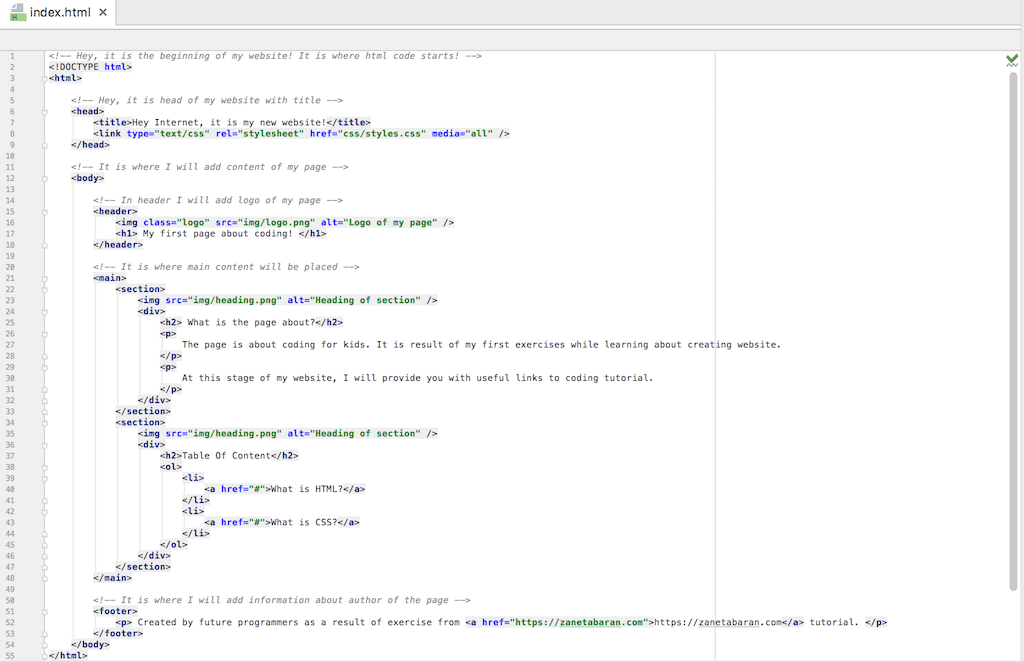
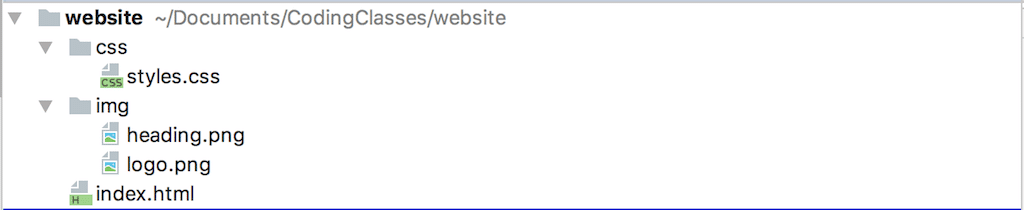
Let’s see our final results with styling. Our site is ready!! Before we move forward, let’s double check if your file structure is correct. The picture below shows what you should have achieved by now:
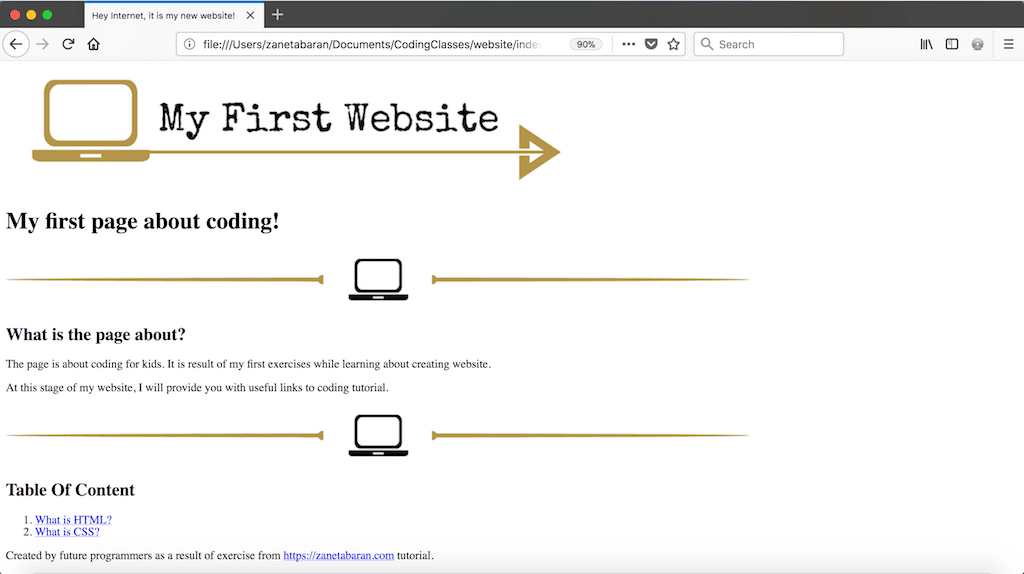
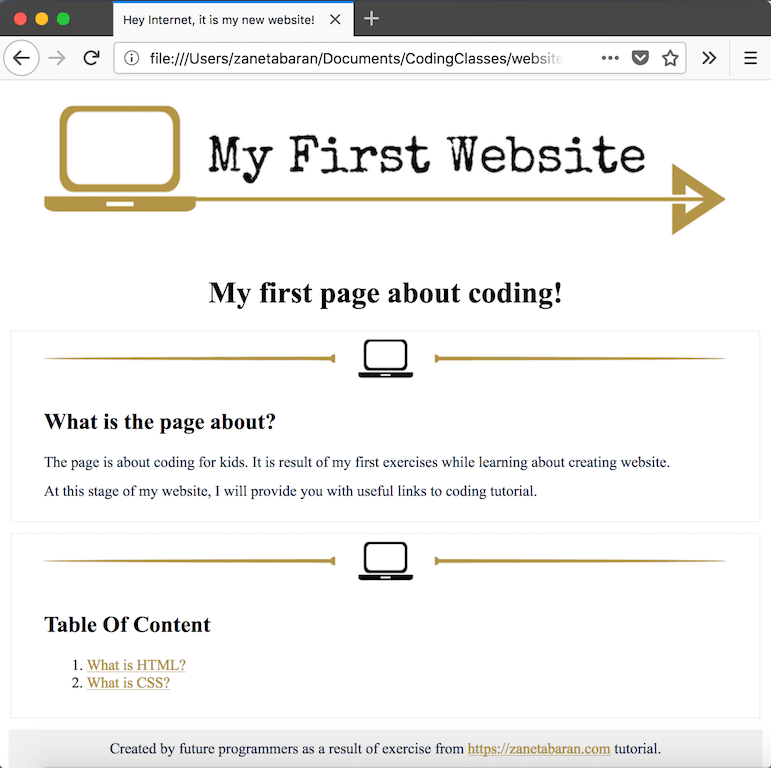
Desktop Preview
This is what your website will look like on your laptop:
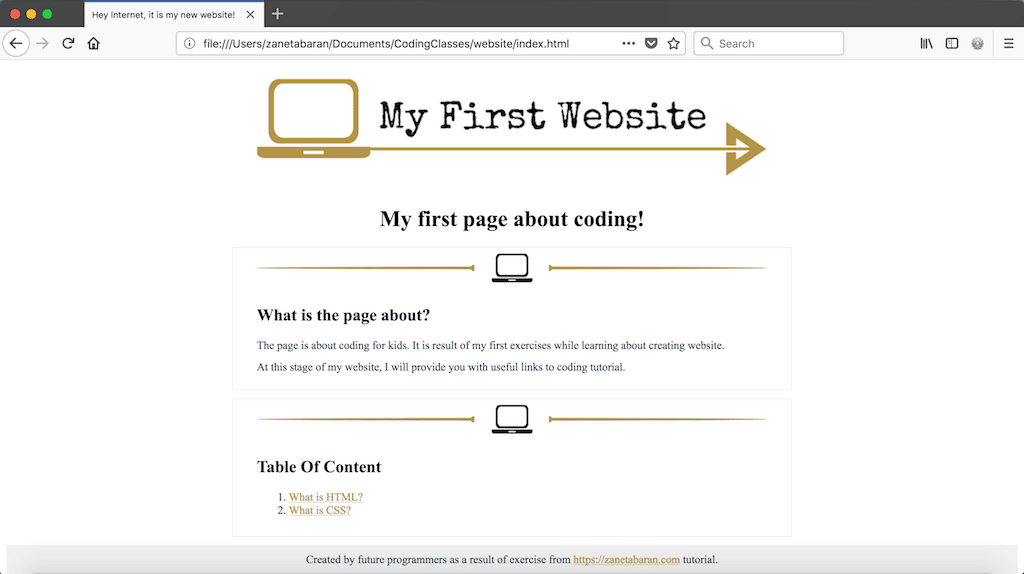
Tablet Preview
This is how your website will look on your tablet:
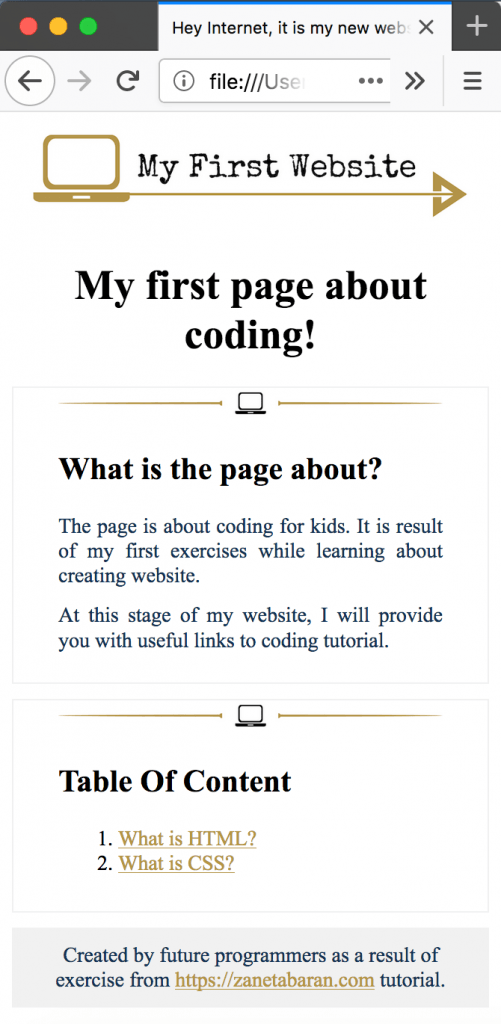
Mobile Preview
This is how your website will look on your mobile phone:
There was so much code during our lesson. To make it easier, I put all the tags into a table which will help you to remember all of them.
CSS selectors
| Directly Pointing Elements | |
| Classes | |
| Ids | |
| Descendant Elements | |
| Multiple Selectors | |
CSS properties
| Text Properties |
| ||||||||
| Colour Properties |
| ||||||||
| Spacing Properties |
| ||||||||
| Width & Height | Defines the width/height of an element | ||||||||
| Max-width & Max-height | Defines the minimum width/height of an element |
What is next…?
Hurrah!!! We have managed to create our first styling. Our site looks a little bit better now. Check it out by double clicking index.html file in the website folder. Next classes…? During the next class we will have a wrap up of everything that we have learned and we will finish the first series – Basic Tutorial.
To download packages of all our files – Coding Classes For Kids – Styles Introduction – CSS Selectors & Properties – Basic Tutorial click Website.
Zaneta loves challenges so deciding about career path she has chosen typical male industry. Woman who codes. Every 1-2 years she lives in different part of the world. Gym dates is something what she specialised in. Healthy lifestyle, extreme sports and motorbikes have stolen her hear years ago.